Edit A Menu Item
With smart context aware, Elemental Menu clones entire menu context when editing a menu item. It makes everything truly live.
Table of Content
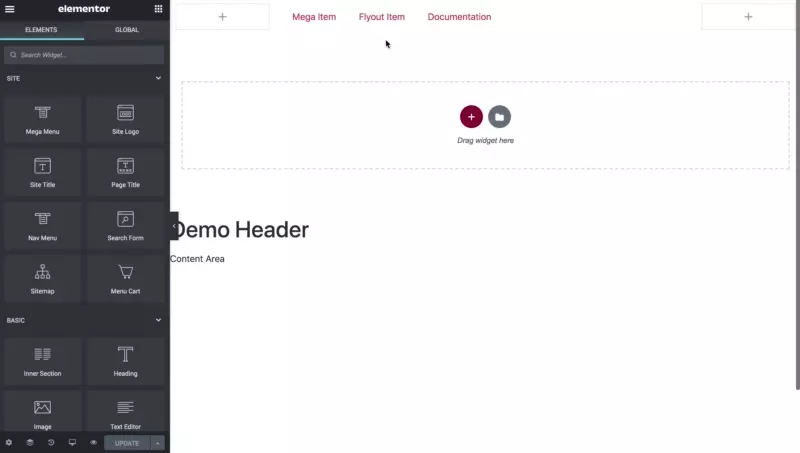
To start editing a menu item, hover over the menu item you want to edit and click on “Edit Item” button. A menu item editor will show up with original menu context like this:
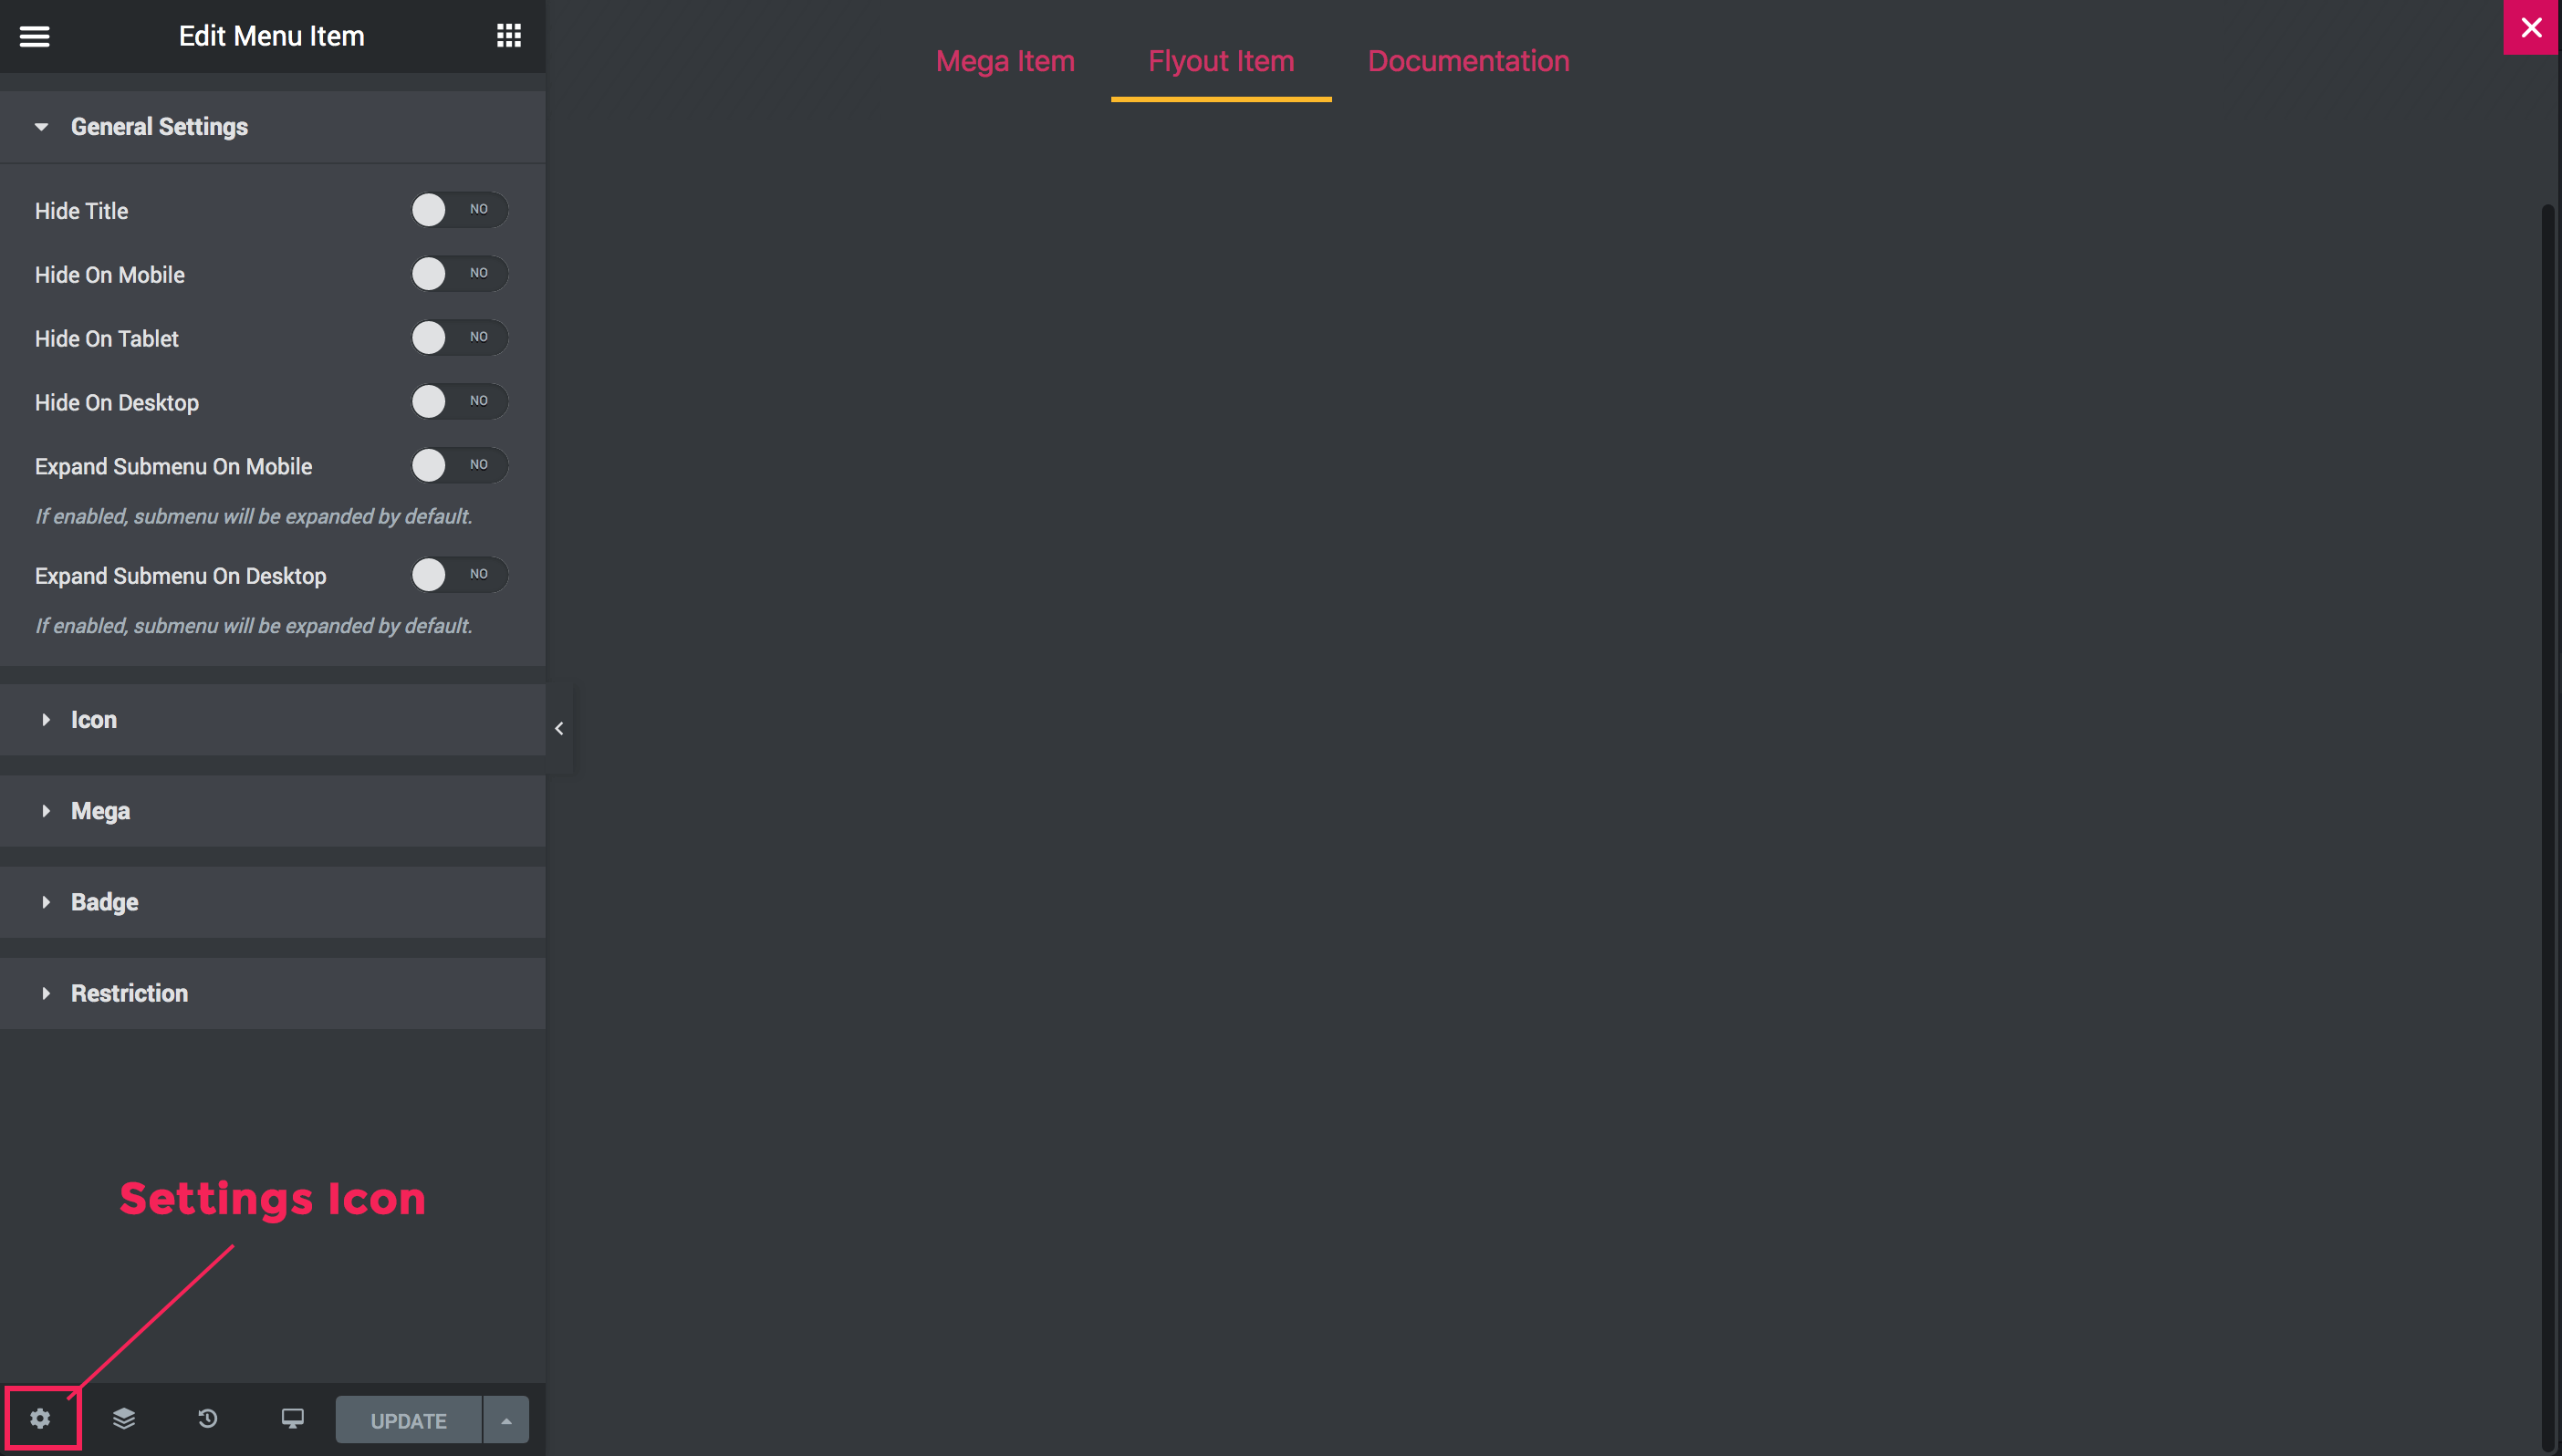
Then, click on the Settings icon at the bottom left (bottom right for RTL languages) to access menu item settings and start editing.
1. General Settings section
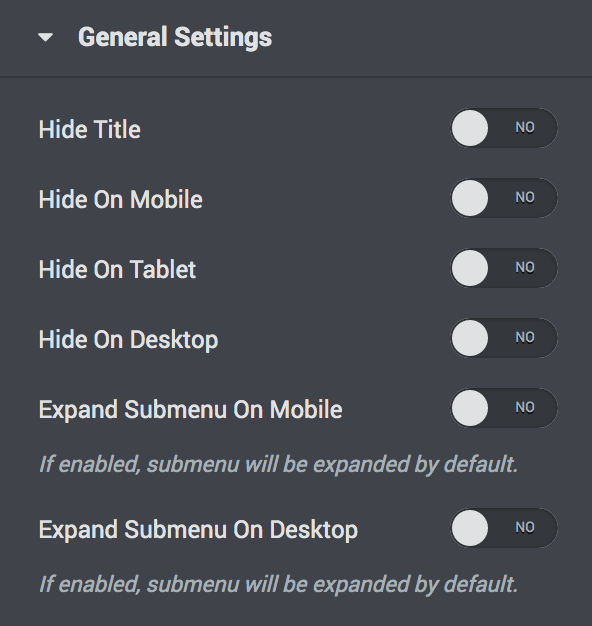
This section contains general settings for the editing menu item. The control labels are descriptive. Try it yourself to see how things work.
2. Icon section
![]()
Currently, there’s only one control which allows you to choose menu item icon in this section.
3. Mega section
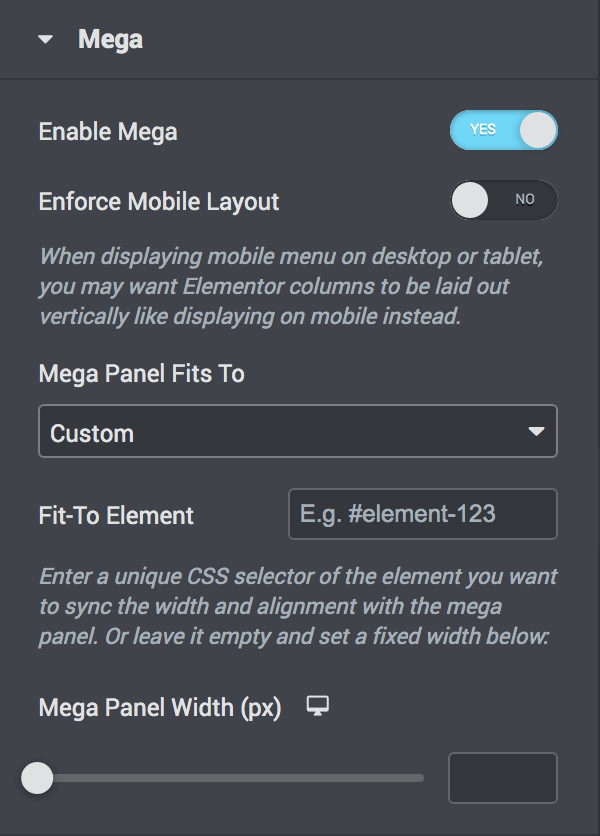
- Enable Mega: Enable mega menu for the editing menu item or not.
- Enforce Mobile Layout: When displaying Mobile Menu on Desktop, Elementor still renders columns for Desktop layout. If you’re lazy to add custom CSS code, try this option.
Mega Panel Fits To: Select full screen width or an HTML element to sync the width and alignment of the Mega Submenu with that element. If you inspect Elementor’s HTML code, the options are based on this structure:
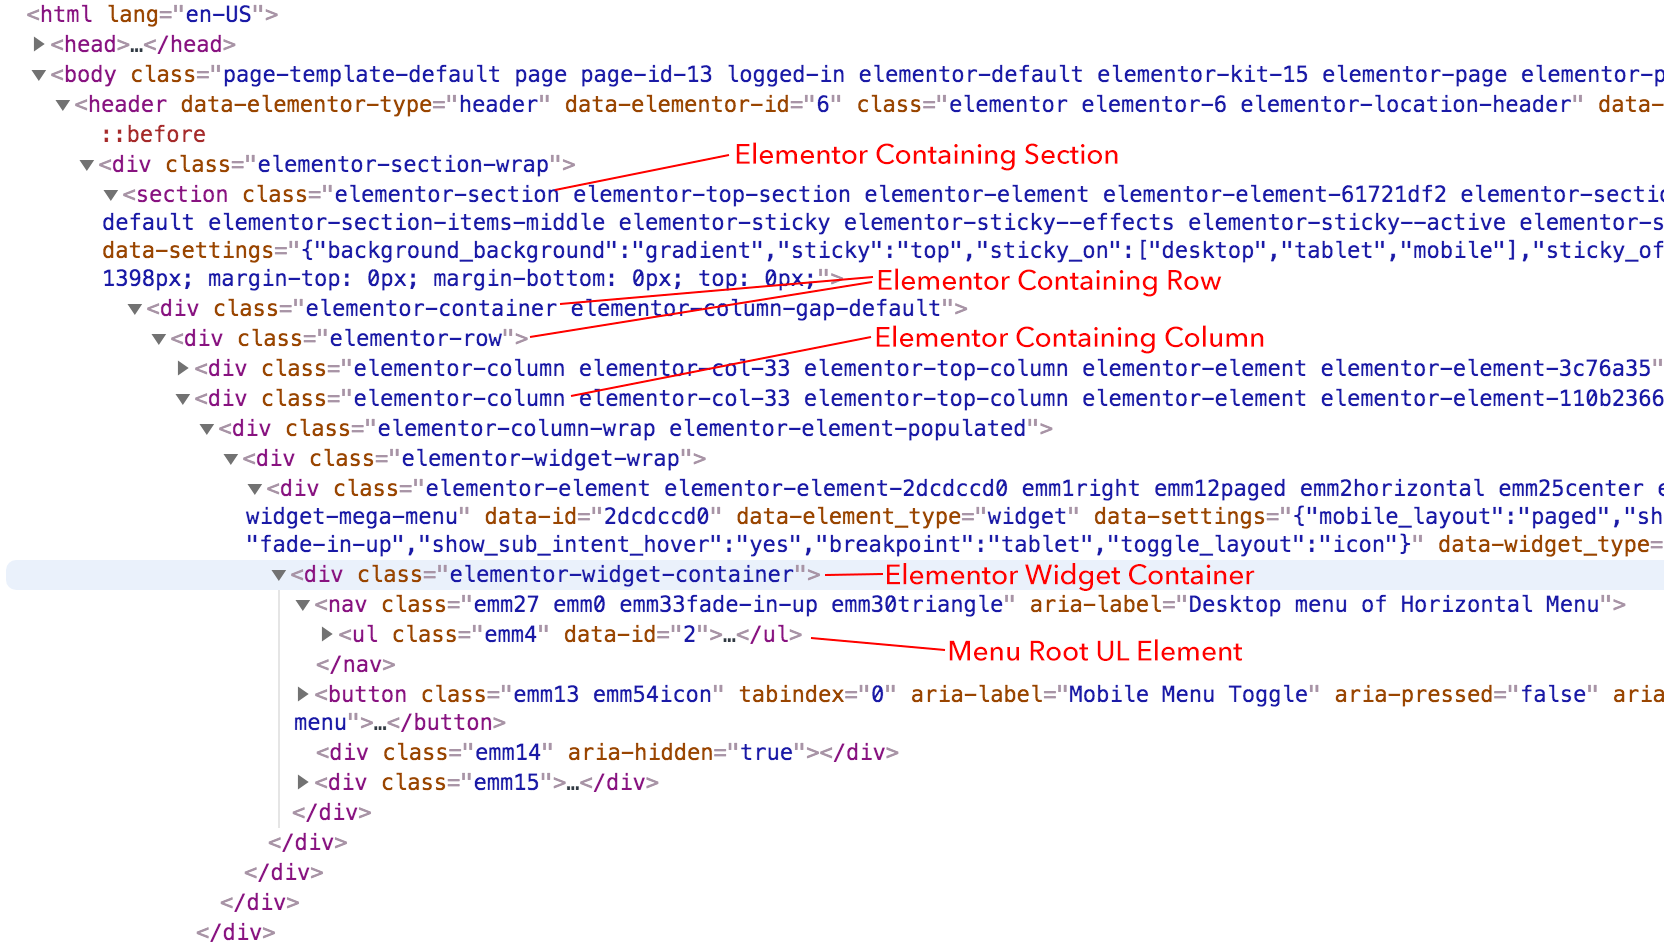
- Fit-To Element: When the “Mega Panel Fits To” option is “Custom”, you may use this option to use a custom HTML element instead of using the default options. Note that the DOM on the menu item editor is different from the actual DOM where the menu will be rendered. So, there may be notices about Fit-To element not found, just ignore it.
- Mega Panel Width: If you want a fixed width, use this option. The position of the mega submenu will be calculated automatically to make sure everything is responsive.
4. Badge section
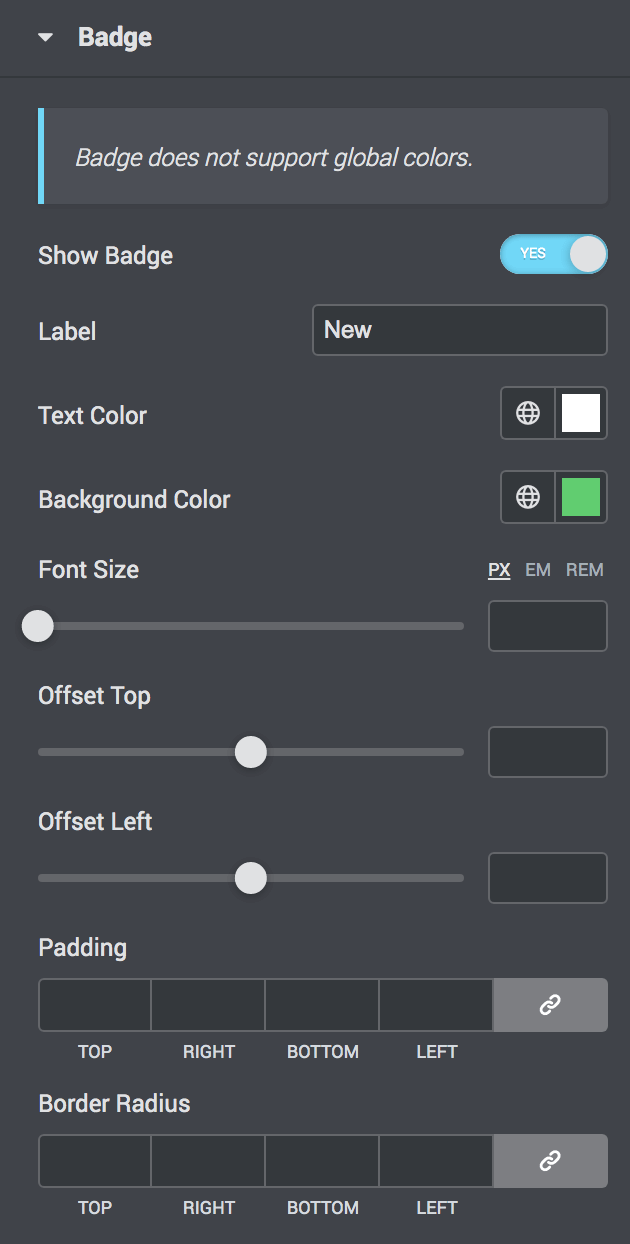
The control labels in this section are descriptive. Please try it out if you’re not sure how things work. Note that Badge DOES NOT support global colors.
5. Restriction section
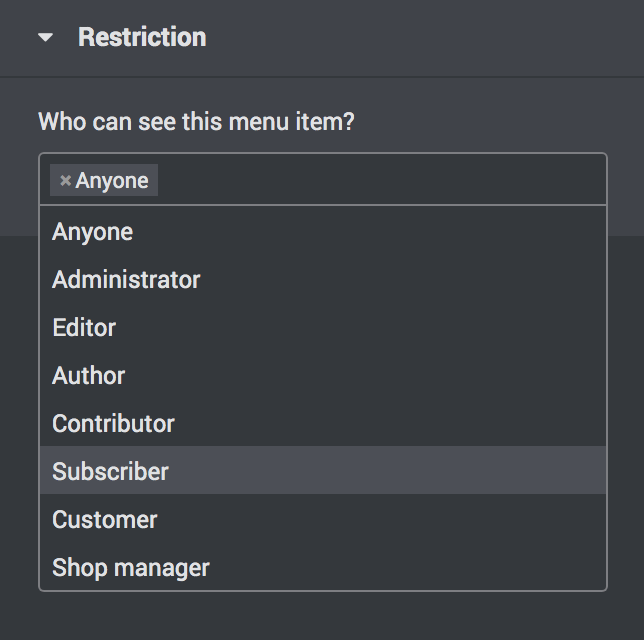
Use this control to limit users who can see the editing menu item.